Printing from a library computer
-
Check the printing credit on your account
The Web Print portal displays your account's balance, and allows you to recharge if necessary.
Web Print portal
To check your account's balance, select the 'Summary' tab - the balance will be displayed under 'UoM Balance'.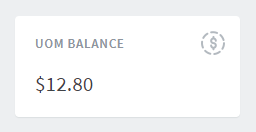
To top-up the credit on your account, select the 'Account Recharge' tab and follow the steps. Please note the minimum top-up amount is A$5.

Current printing pricing is listed on the Student Print page .
-
Submit the job from the computer
From any library computer, you can print directly to the Student Print queue. Select File > Print from the application. Print jobs will submit in A4, black and white, single-sided by default.
If you would like to print in A3, colour, or double-sided, this will need to be specified in Printer Properties.
Adjusting Printer Properties -
Release the job from your nearest printer
Once the job has been submitted, you can go to your nearest MFD to release the job. Simply tap your Student ID card on the printer, or log in using your username/password from the touchpad.
Current MFD locations are listed on the Student Print page.
Open the Printer Properties dialog
In Microsoft Office applications, click Print (Ctrl + P) and then select 'Printer Properties' below the Printer field: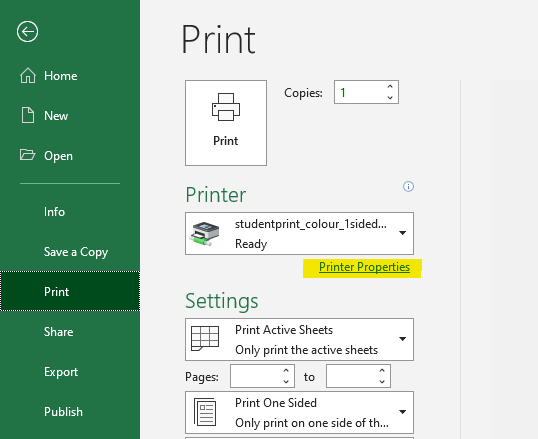
In Adobe Acrobat, click Print (Ctrl + P) and then select 'Properties' next to the Printer field: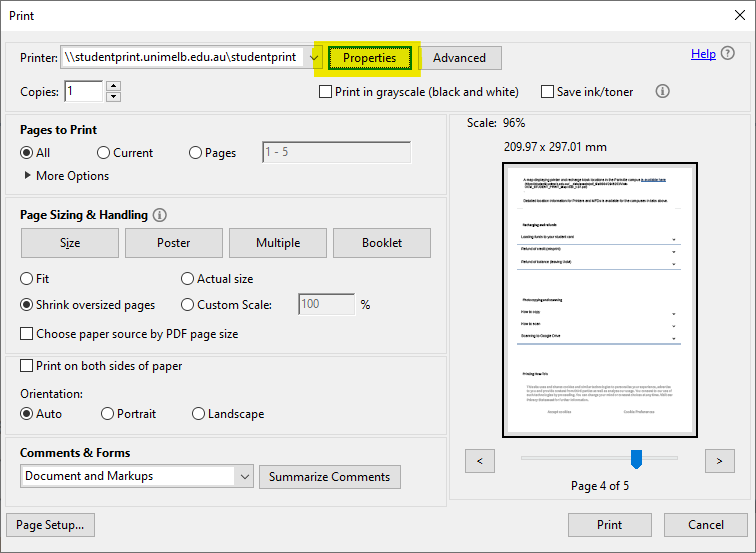
In Google Chrome, press Ctrl + Shift + P and then select 'Preferences' in the Select Printer panel: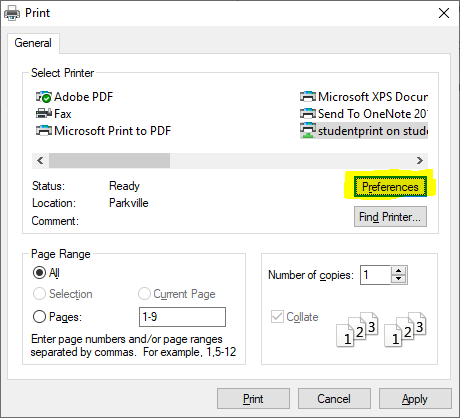
Adjust settings as required
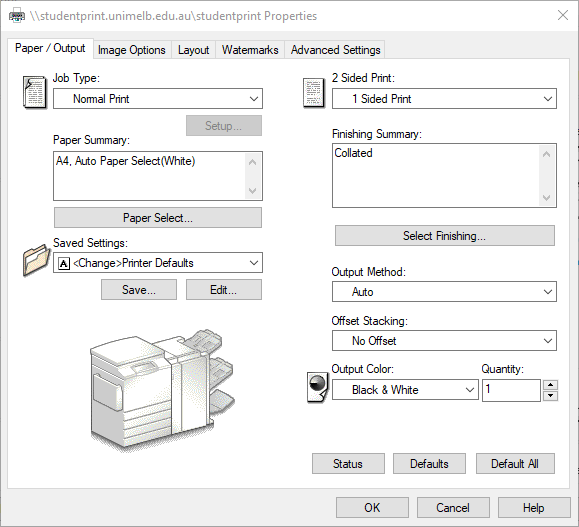
To print in colour, change the 'Output Color' field from Black & White to Colour.
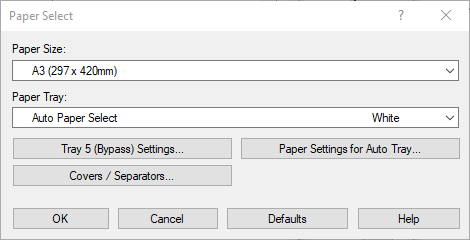
To print in A3, click the 'Paper Select...' button and scroll up to A3 in the list, as shown:
To print 2-sided pages, change the '2 Sided Print' field from 1 Sided Print to either of the 2 Sided Print options.