OneNote
Your University of Melbourne student account will be disabled following a 12-month grace period.
Therefore, you will only have this period to be able to download your OneNote data before your data is revoked from University systems.
Access to applications part of student Microsoft 365 licensing, including OneNote, will expire at the end of your 12-month grace period.
What you need to do
Export your OneNote notebooks that you wish to keep.
Windows
Students with access to Windows devices can follow one of the three methods below to export notebooks from their University OneNote account. Please choose the method best suited to your device, storage, and circumstances.
-
If you would like your notebooks exported as PDFs, please be aware that large notebooks may take longer to export, and you will no longer be able to edit them once the export is complete.
- Launch the OneNote Desktop App.
- Select the notebook you want to export.
- Click on File > Export.
- Under "1. Export Current:", select Notebook.
- Under "2. Select Format:", select PDF.
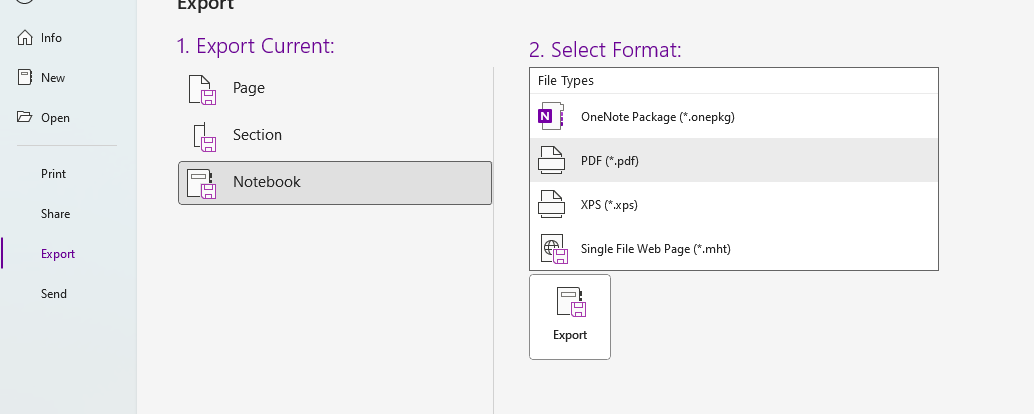
- Click Export.
- Select a location to save the export and ensure the "Page Range" is set to Current Notebook.
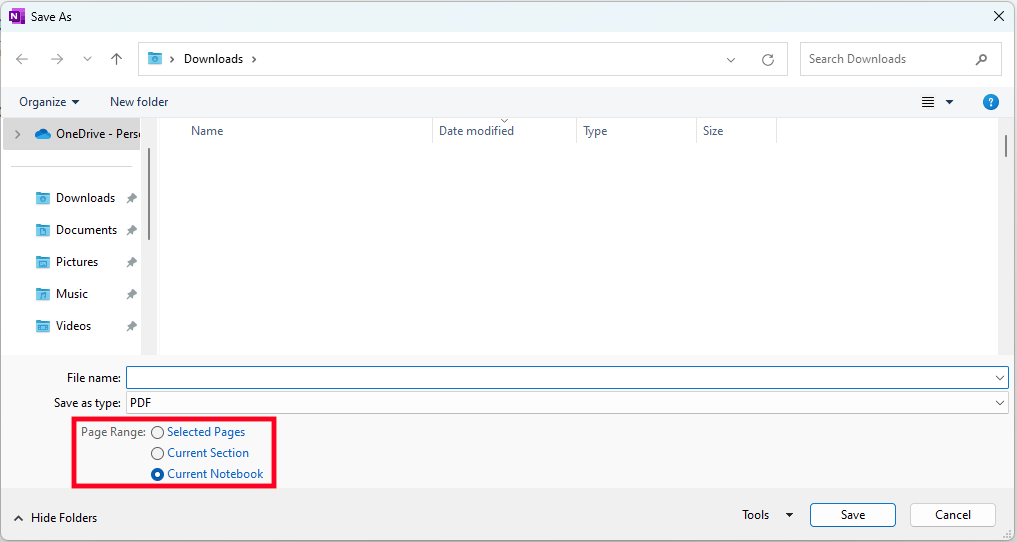
If you have any concerns about local storage space on your device, please save the PDF files to your preferred personal cloud storage location (e.g., Google Drive, OneDrive, or Dropbox).
-
The .onepkg format exports an entire OneNote notebook, including all its sections, as a single compressed file. These files can be opened in OneNote using another account, allowing you to continue editing them.
Export
- Launch OneNote app > Ensure you are logged into your University OneNote account > Click on File
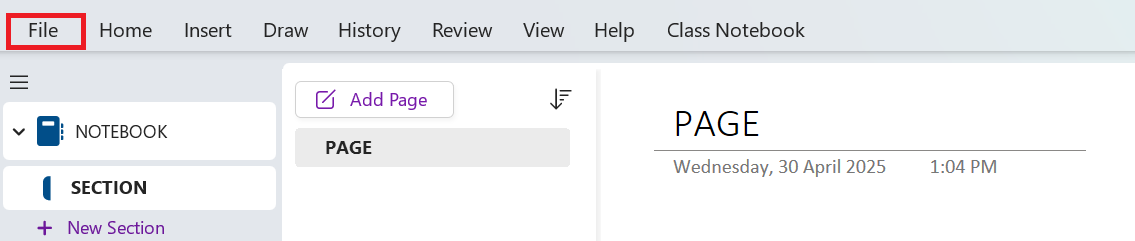
- Click on Export on the left side bar > Select Notebook > Select OneNote Package (*.onepkg) > Click on the Export button

Import
- Launch OneNote app > Ensure you are logged into your personal OneNote account > Click on File
- Click on Open > Browse > Find the folder you exported the notebook to > Select "OneNote Files" as the File Type.

Note: If your OneNote app closes after importing, please re-open it to confirm if the import was successful.To confirm if the notebooks are all synced to your personal OneNote cloud/Online after the import, please check their Sync Status here. - Launch OneNote app > Ensure you are logged into your University OneNote account > Click on File
-
If you encounter any issues exporting your notebooks as .onepkg files, you can manually copy sections from your University OneNote notebooks to your personal OneNote account. This method allows you to continue editing the notebooks after the transfer.
- Launch OneNote app
- If you have not, please add your personal Microsoft account to the OneNote app by following the steps here
- Ensure you have chosen your personal OneNote account (you can see the selected profile on the top right of the OneNote app)
- Create empty notebooks using your personal OneNote account by following the steps here.
Note. You will need to create the same number of notebooks as you plan to export from your University Microsoft account - Clearly name these notebooks so you can easily differentiate which ones are saved in your personal and University Microsoft accounts. For example, [Notebook name] Personal
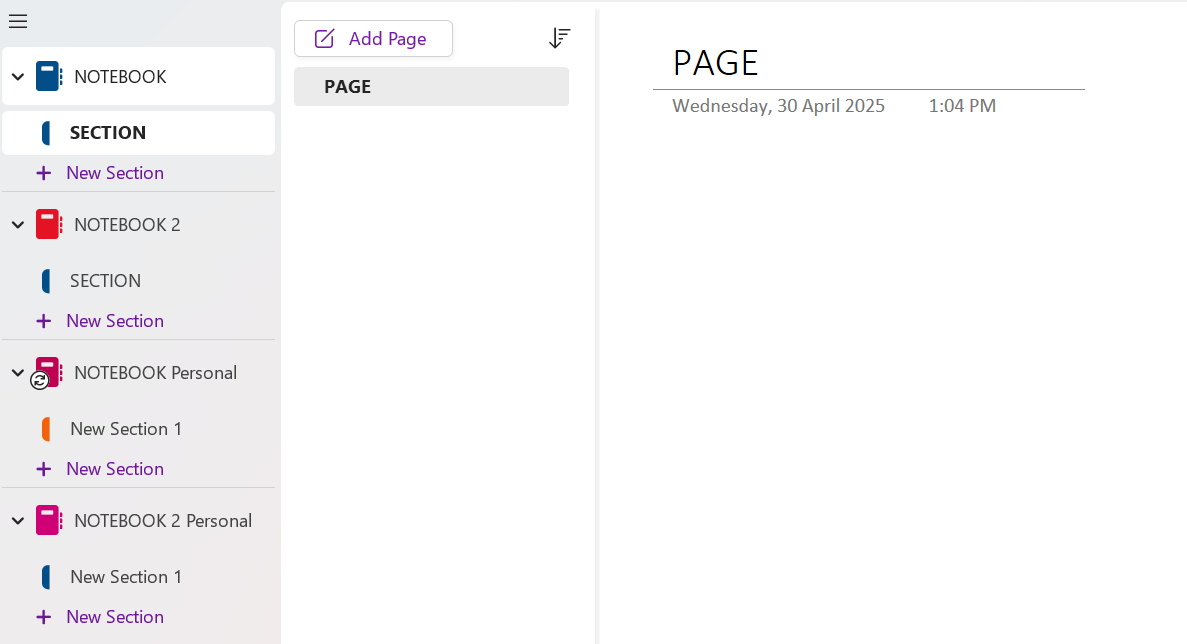
- Click the Profile tab on the top right and select your University OneNote account
- Right click on one of the Sections from the one of the notebooks in your University account > Click Move or Copy

- Choose the newly created notebook (Step 4) that you would like to transfer the Section to > Click "Copy".

Note. This is to make sure you still have access to the original file if an error occurs during the transfer - Please do this for each section of any existing notebooks in your University OneNote account:
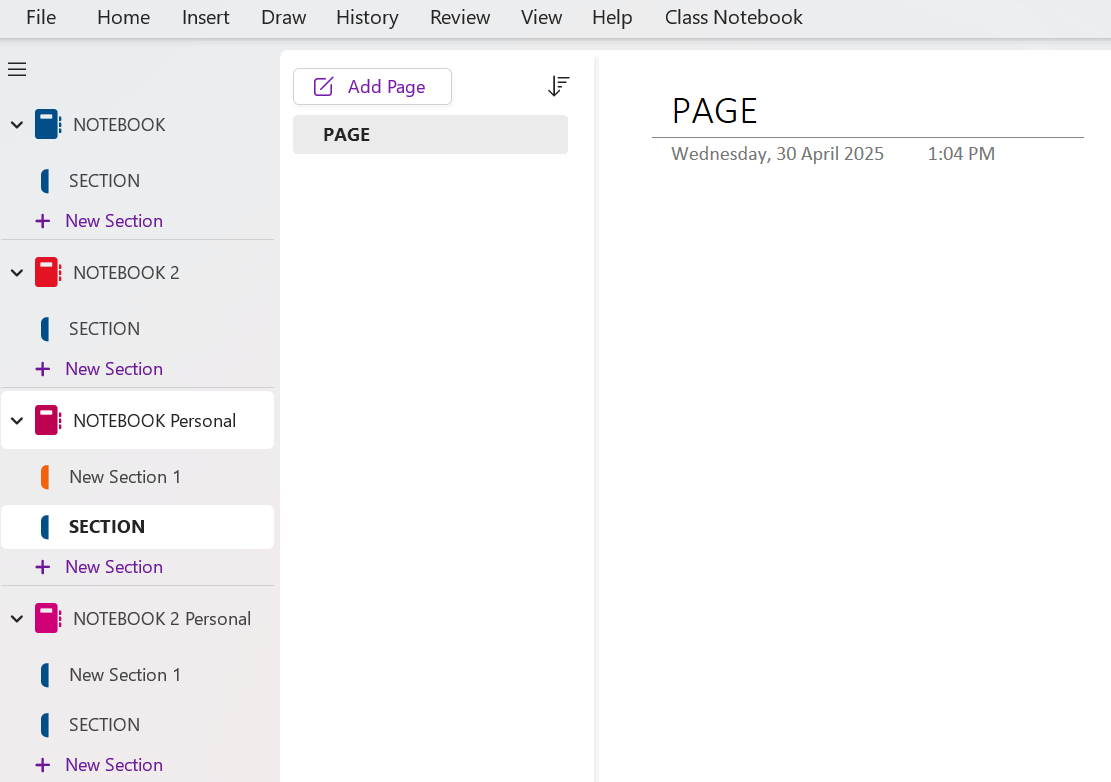
To confirm if the notebooks are all synced to your personal OneNote cloud/Online after the transfer, please check their Sync Status here.
macOS
- Launch the OneNote Desktop App.
- Click the profile in the bottom left corner.
- Click the + next to Connected Services.
- Under "Add Storage Account", click on OneDrive (Add your personal account).
- Sign in to your personal Microsoft account.
- Create a new notebook.
- Go to your university notebook.
- Copy sections from your university notebook to the new notebook in your personal account.
Note. Please use the Copy function to ensure you still have access to the original file if an error occurs during the transfer
Prev: Export OneDrive and SharePoint Next: Download your other account data