Student Email
Find out more about accessing and setting up your student email

Your student email
Microsoft Outlook is the main email provider for students at the University of Melbourne. Your student email is part of your student Microsoft 365 account, where you have access to other Microsoft 365 apps such as Microsoft OneDrive and Microsoft Word. For more information, visit the Student IT Microsoft 365 page.
Your student email is activated at the same time as your student account.
While you are enrolled at the University, there is an expectation that you check your email inbox regularly. The recommended frequency is to check two times a week.
Access your email
How to log in to Microsoft Outlook
- Enter your student email address.
- Sign in with your SSO username and password.
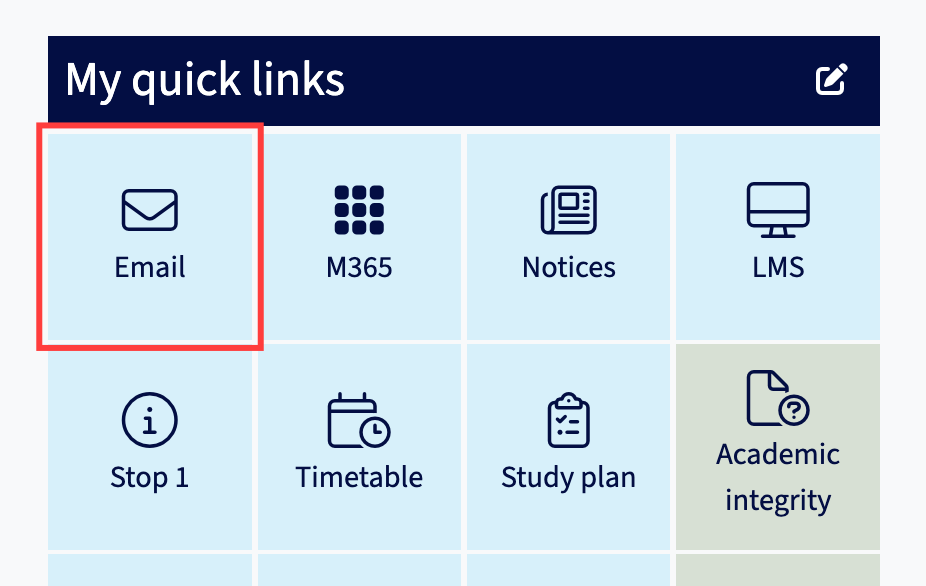
You can also access your student email via the Email tile under "My quick links" in the my.unimelb Student Portal.
Support & troubleshooting
-
- Ensure you have set up your student account.
- Sign out of your personal Microsoft Outlook account.
- Perform basic browser troubleshooting.
If you are still unable to access your student email via your browser and require further assistance, please contact Student IT.
-
If you used Microsoft 365 or Microsoft Outlook in a previous organisation (former school, university or workplace), you will need to log out of your account and close the browser.
Open your browser and login with your University of Melbourne student account to access Microsoft Outlook in your browser.
Email alias
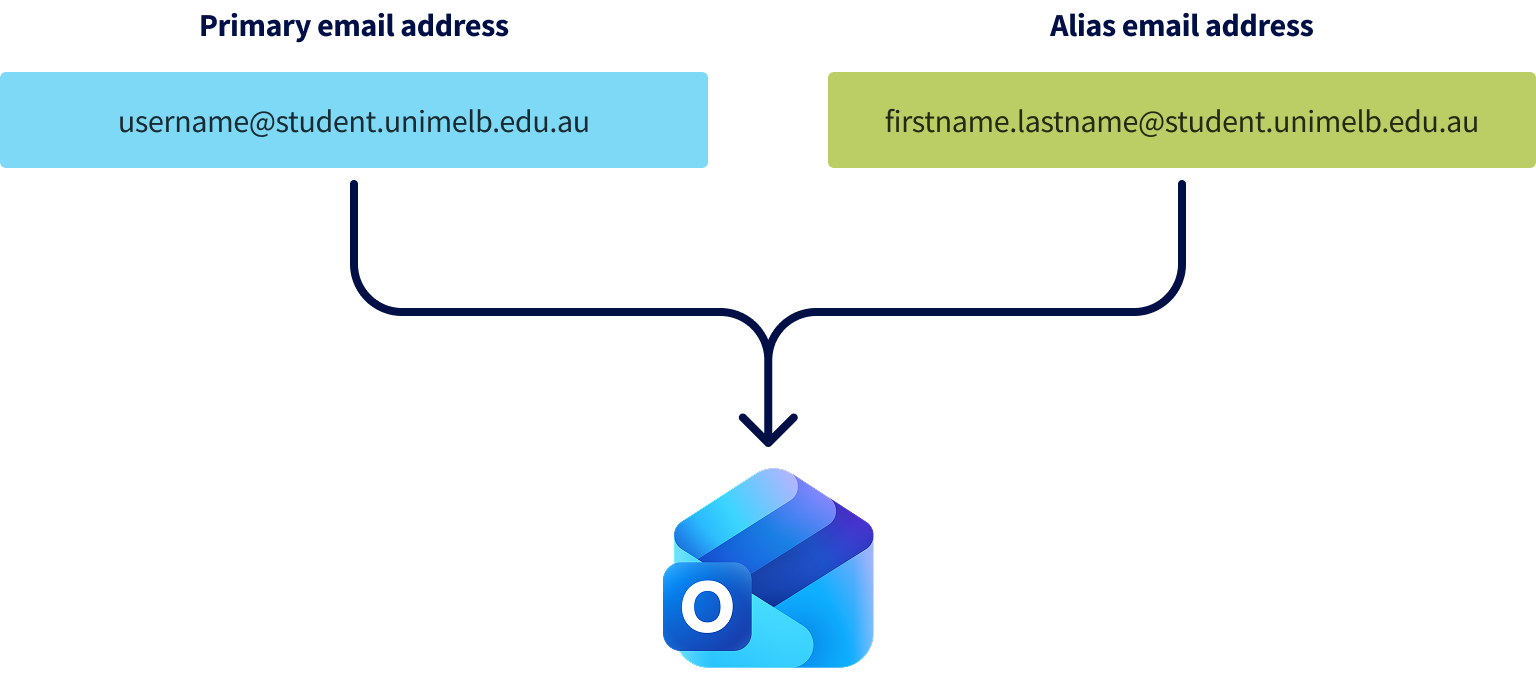
In addition to your primary email address, you are provided a secondary email address, known as your alias email address. Your alias email address usually follows the format:
[first name].[family name]@student.unimelb.edu.au
Your first initial or preferred name can appear instead of your first name in your alias email address.
This email address is stored in the Student Admin system and University communication will likely be sent to this email address. This means you have one email inbox, which can send and receive emails from two different email addresses.
Alias email address benefits
- You can share this email address with others to keep your username private.
- You prefer the alias email address as the email address for others to see.
- You have changed your name or have a preferred name and have been provided a new alias.
Support & troubleshooting
-
To see what your student email alias is, visit your Personal Details page in my.unimelb and click Manage my details. Your email alias will be listed in the ‘Contacts’ section as your preferred email address. This is the same address stored in the University’s Student Admin system.
-
- Go to Outlook and Sign In to your account.
- Click the gear icon on the top right of your screen to show Settings.
- Click Mail on the left side of your screen.
- Select Compose.
- Under Addresses to send from, select the alias you would like to send emails from.
- Click Save at the bottom of the screen.
-
Any emails you send from your student account will automatically use your primary email address as the sender address.
Having an alias email address will not affect any emails which you send as a student unless you change your default address to your alias, in which case the sender address will change to that address.
After you add an alias email address to your account:
- Click the New Email button to start a new email or click the Reply link under an email you have received to reply to it.
- Click on the email address beside From.
- Select either your primary email address or your alias email address.
-
Your email alias works like a forwarding email address, so emails sent to your alias email address will appear in your Outlook inbox. All emails sent to your alias email address will automatically appear in your inbox.
It is up to you which email address you prefer to provide to others as a contact method.
-
You can request a new email alias for the following reasons:
- You have a had a legal name change (e.g. marriage, gender affirmation, etc.)
- You have a preferred first name
To request a new email alias:
- Update your legal name or preferred name using the steps on the Change to name and personal details page
- Submit a Student IT support form
Please note that you cannot choose your new alias email address. The new alias email address will follow the standard alias email address format.
Please note: Changing your email alias may risk wiping your Microsoft account data.
Email forwarding
Email forwarding is enabled for student Outlook accounts. This allows you to receive emails sent to your student email inbox in another inbox.
Before enabling email forwarding, please note the following important information about forwarding your student emails to another email inbox.
- Arrangement for University student emails to be forwarded to other accounts is at your own risk.
- Non-receipt of emails sent by the University to your UoM student email account after activating email forwarding is not considered to be a valid reason for failure to take any required action regarding your enrolment and/or fees.
- You are still responsible for checking your UoM student email account regularly, as stated in the Enrolment Declaration that students are required to agree to each year.
Within 12 months of completing your studies, your student email account will be deleted. Any forwarding that you have set up will also cease when your account is deleted. It is crucial that you follow the recommended Outlook offboarding steps before deletion.
Support & troubleshooting
-
To enable email forwarding in Microsoft Outlook, follow this guide: Turn on or off automatic forwarding in Outlook.com
We recommend selecting Keep a copy of forwarded messages to keep a copy of the original message in your student email inbox.
-
Certain email domains that are widely used have been approved for email forwarding.
Please avoid using personal email domains (e.g. email addresses that use a personal web domain) or email addresses that belong to other external organisations (e.g. work email address).
If you have enabled email forwarding to a widely used email domain and are experiencing issues, please contact Student IT and include the email address you would like to forward to.
Set up email clients
You can sign into various email clients to access your student email efficiently and on-the-go. The recommended client is Microsoft Outlook, which is available on macOS, Windows, iOS/iPadOS and Android.
Setup Tip: If you have previously used your student Gmail account in the Outlook app on your device, you need remove the account and quit Outlook before proceeding with the steps below.
Microsoft Outlook
Select your operating system and follow the steps to set up Outlook.
-
If you are setting up Outlook for Mac for the first time, you may need to start from Step 4.
- In Outlook for Mac, select the Outlook menu and select Settings.
- Under Quick Settings, select Accounts.
- Under Email Accounts, click on + Add Account.
- Enter your primary student email address
[username]@student.unimelb.edu.auand click Continue.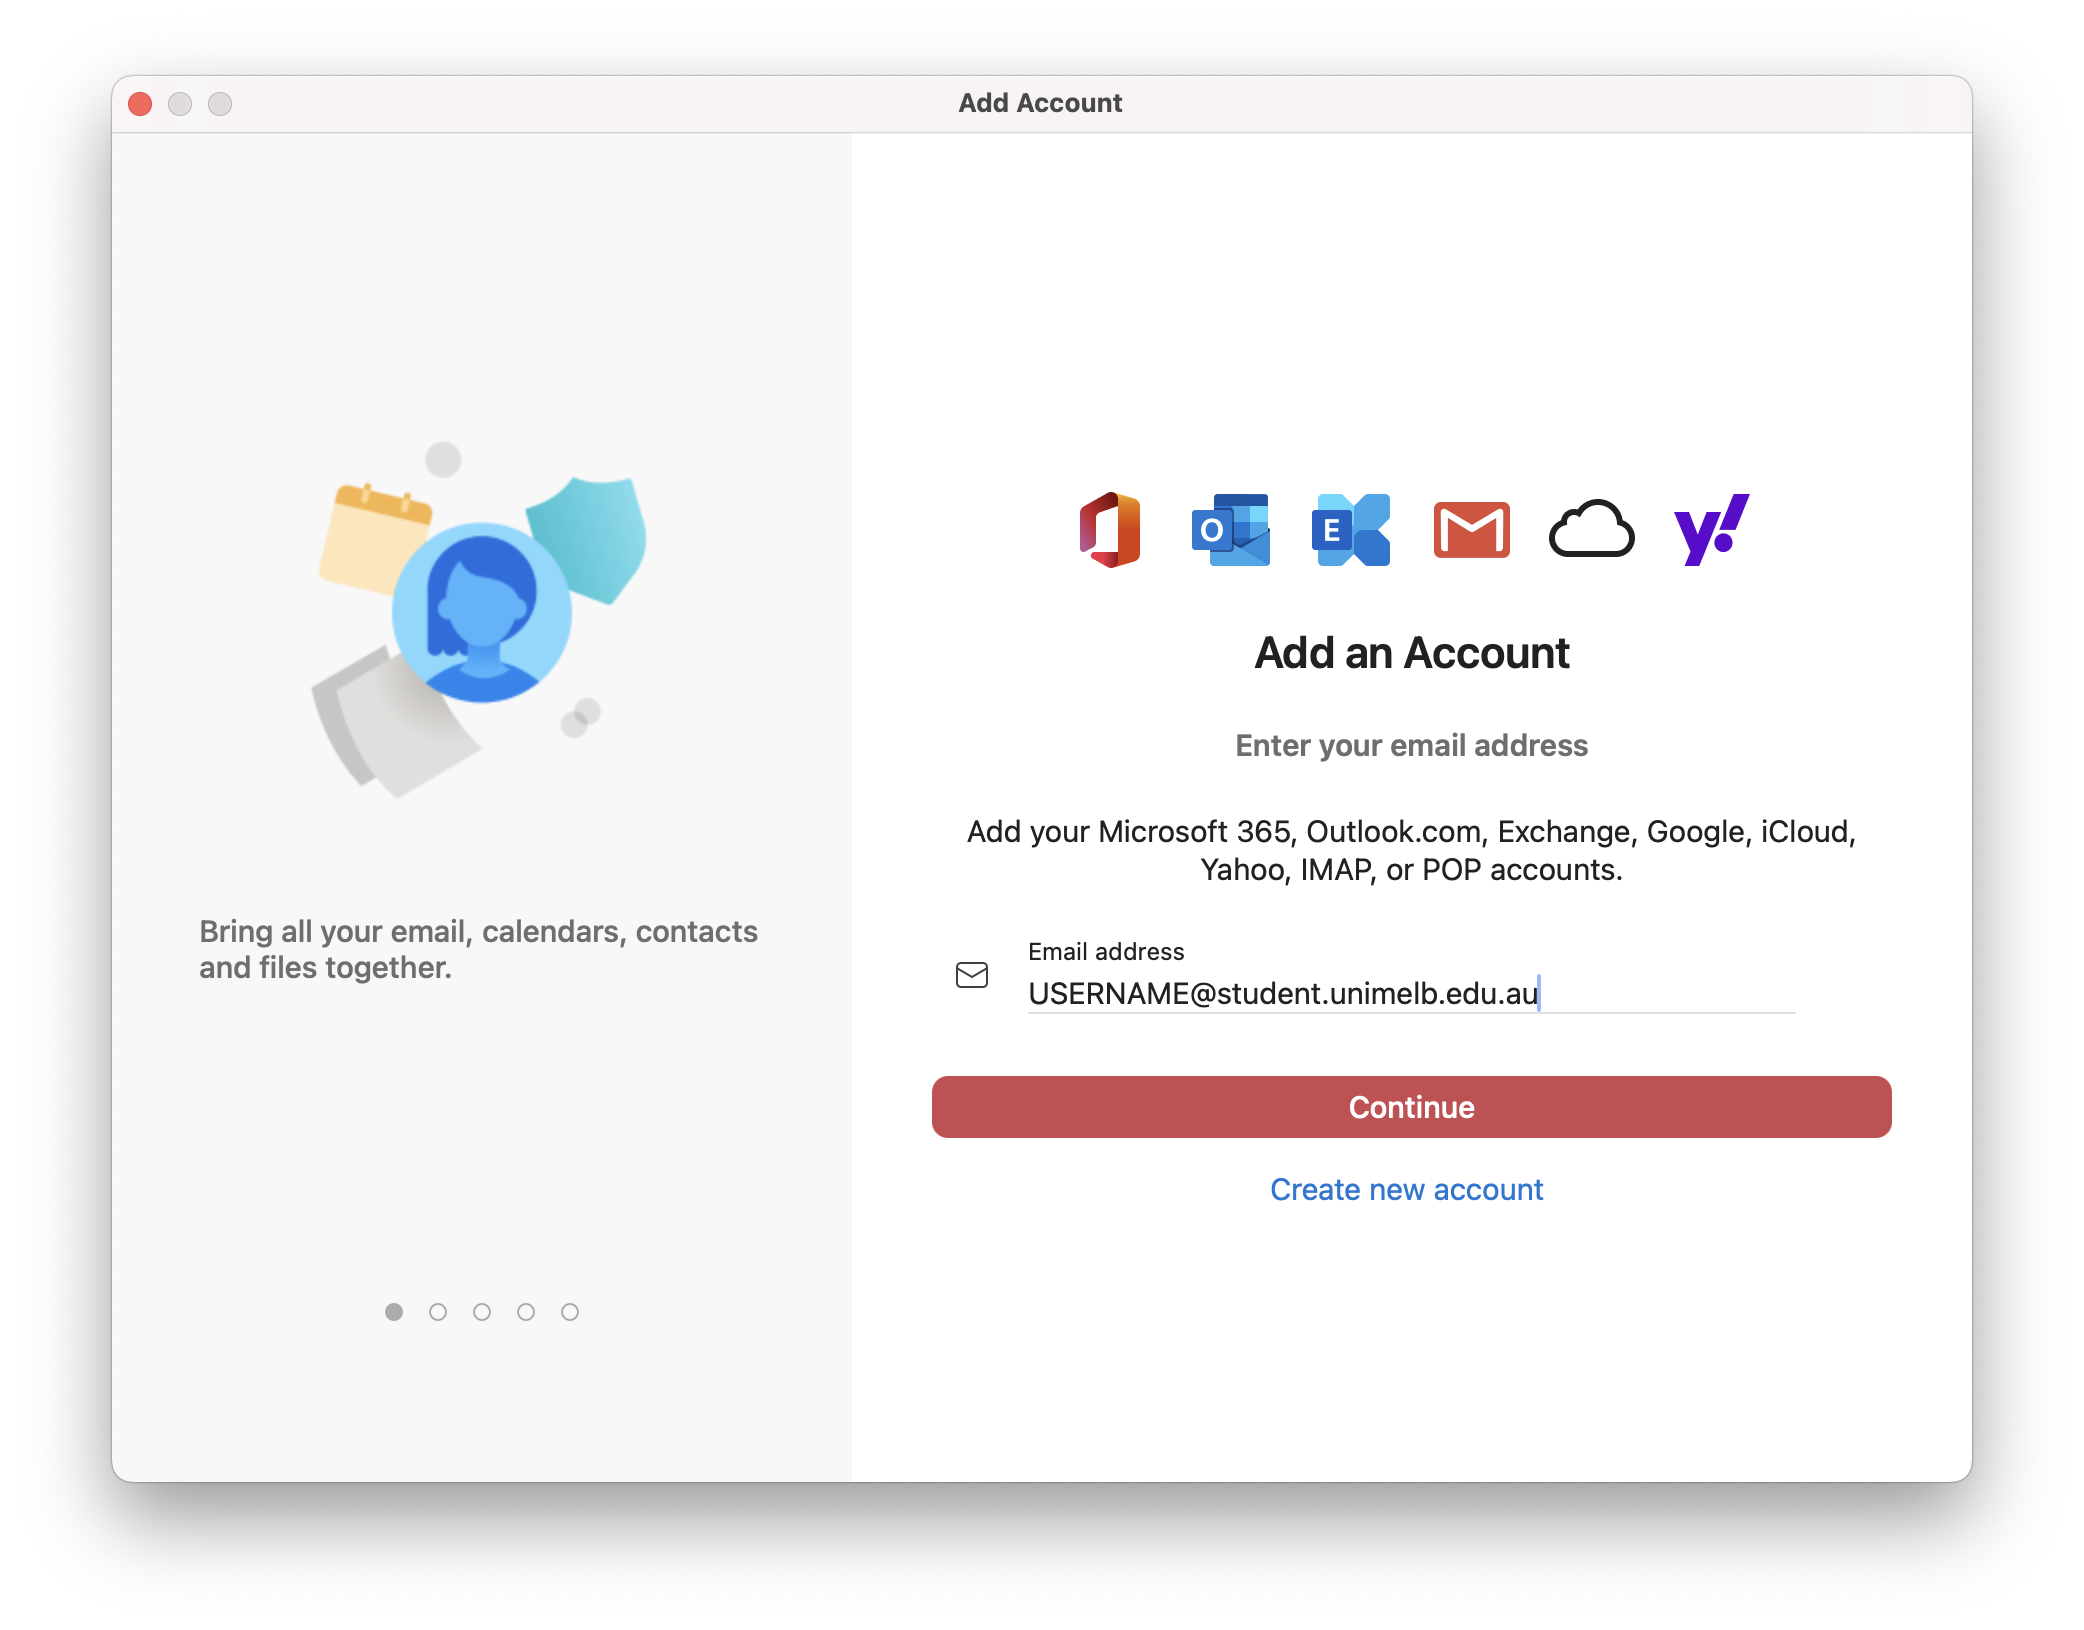
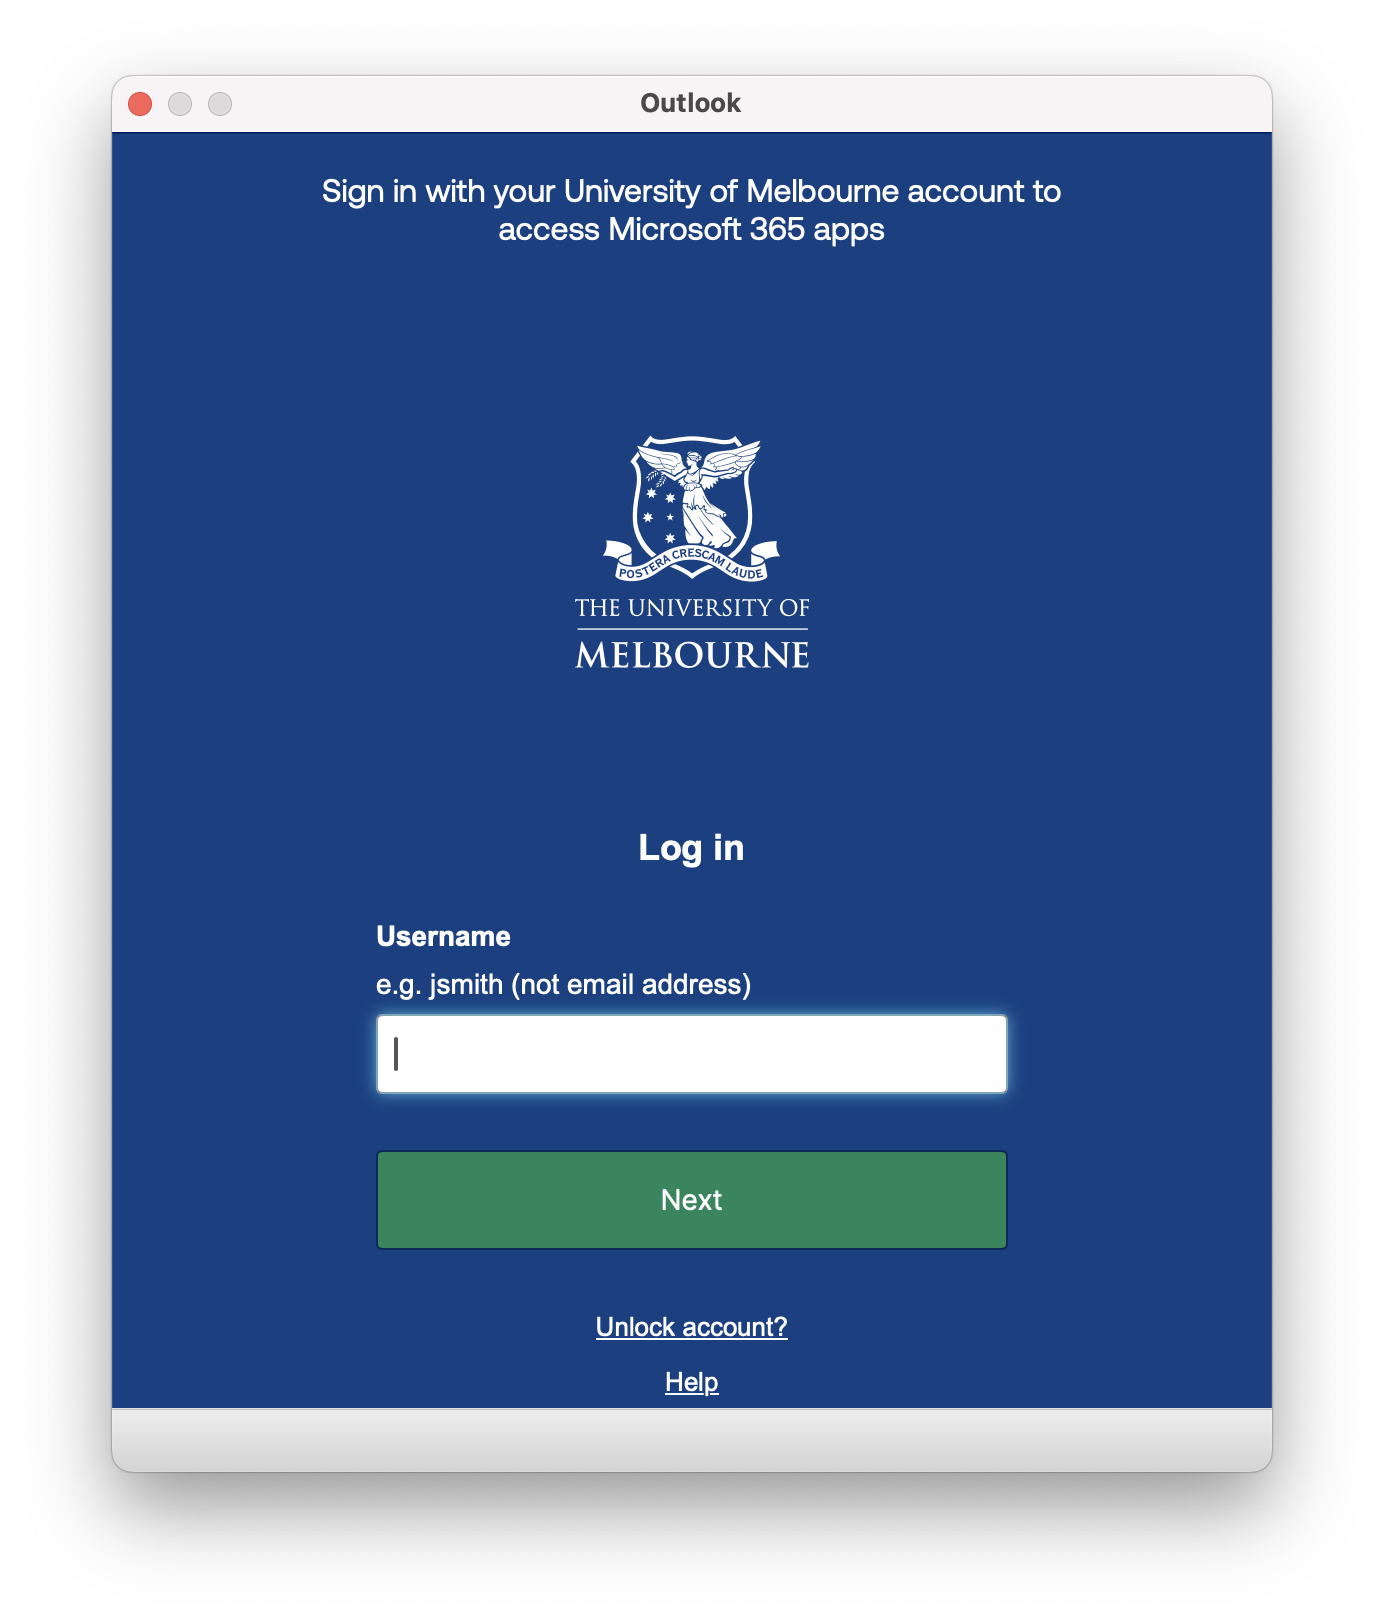
- Outlook will attempt to connect to Microsoft 365, and the SSO login screen will appear.
- Log in using your student Username and Password and verify your sign in using Okta Verify (or your preferred MFA method).
- Your student email account will be added to Outlook.
-
If you are setting up Outlook for Windows for the first time, you may need to start from Step 4.
- On the View tab, select View settings, or from the File tab, select Account info.
- Select Accounts > Your accounts.
- Under Email accounts, select Add Account.
- Enter your primary student email address
[username]@student.unimelb.edu.auand click Continue.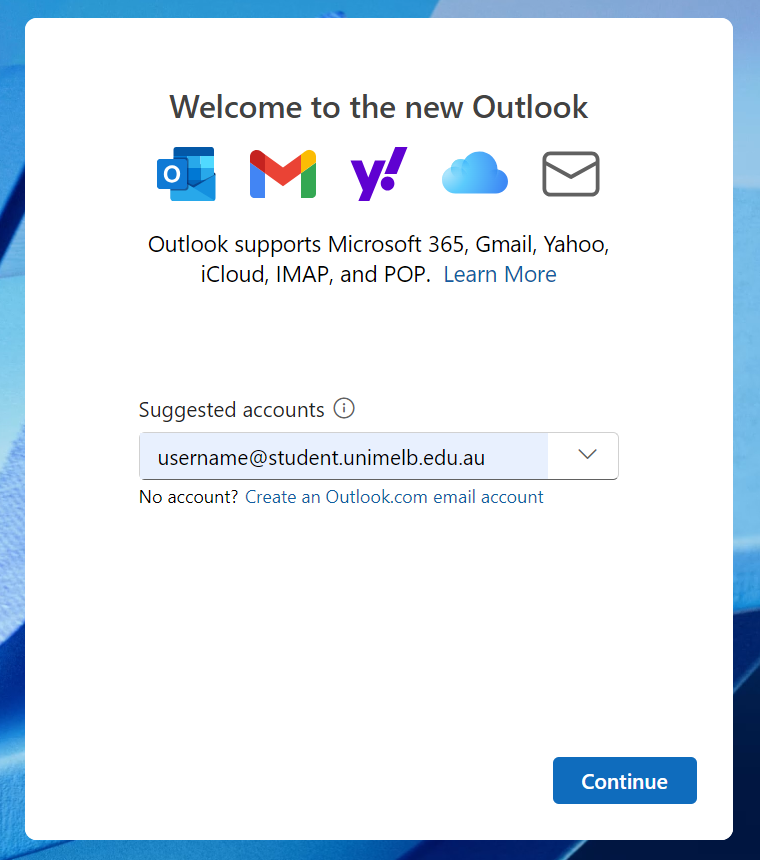
- Outlook will attempt to connect to Microsoft 365, and the SSO login screen will appear.
- Log in using your student Username and Password and verify your sign in using Okta Verify (or your preferred MFA method).
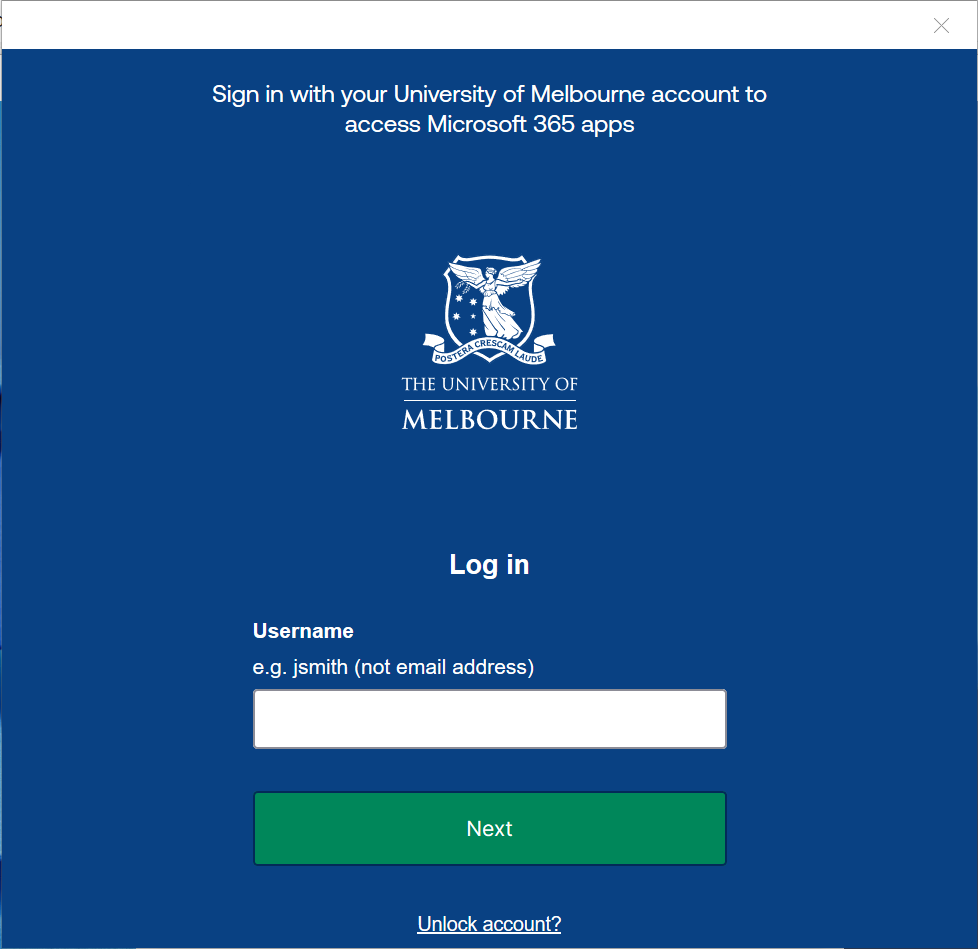
- Your student email account will be added to Outlook.
-
If you are setting up Outlook for iOS/iPadOS for the first time, you may need to start from Step 4.
- Open the Outlook for iOS app on your iOS device.
- At the top of the app, tap Inbox, and then select Settings ⚙︎.
- Under General, select Accounts.
- Select Add Account.
- Select Email Account. This option may not appear if you are setting up Outlook for the first time.
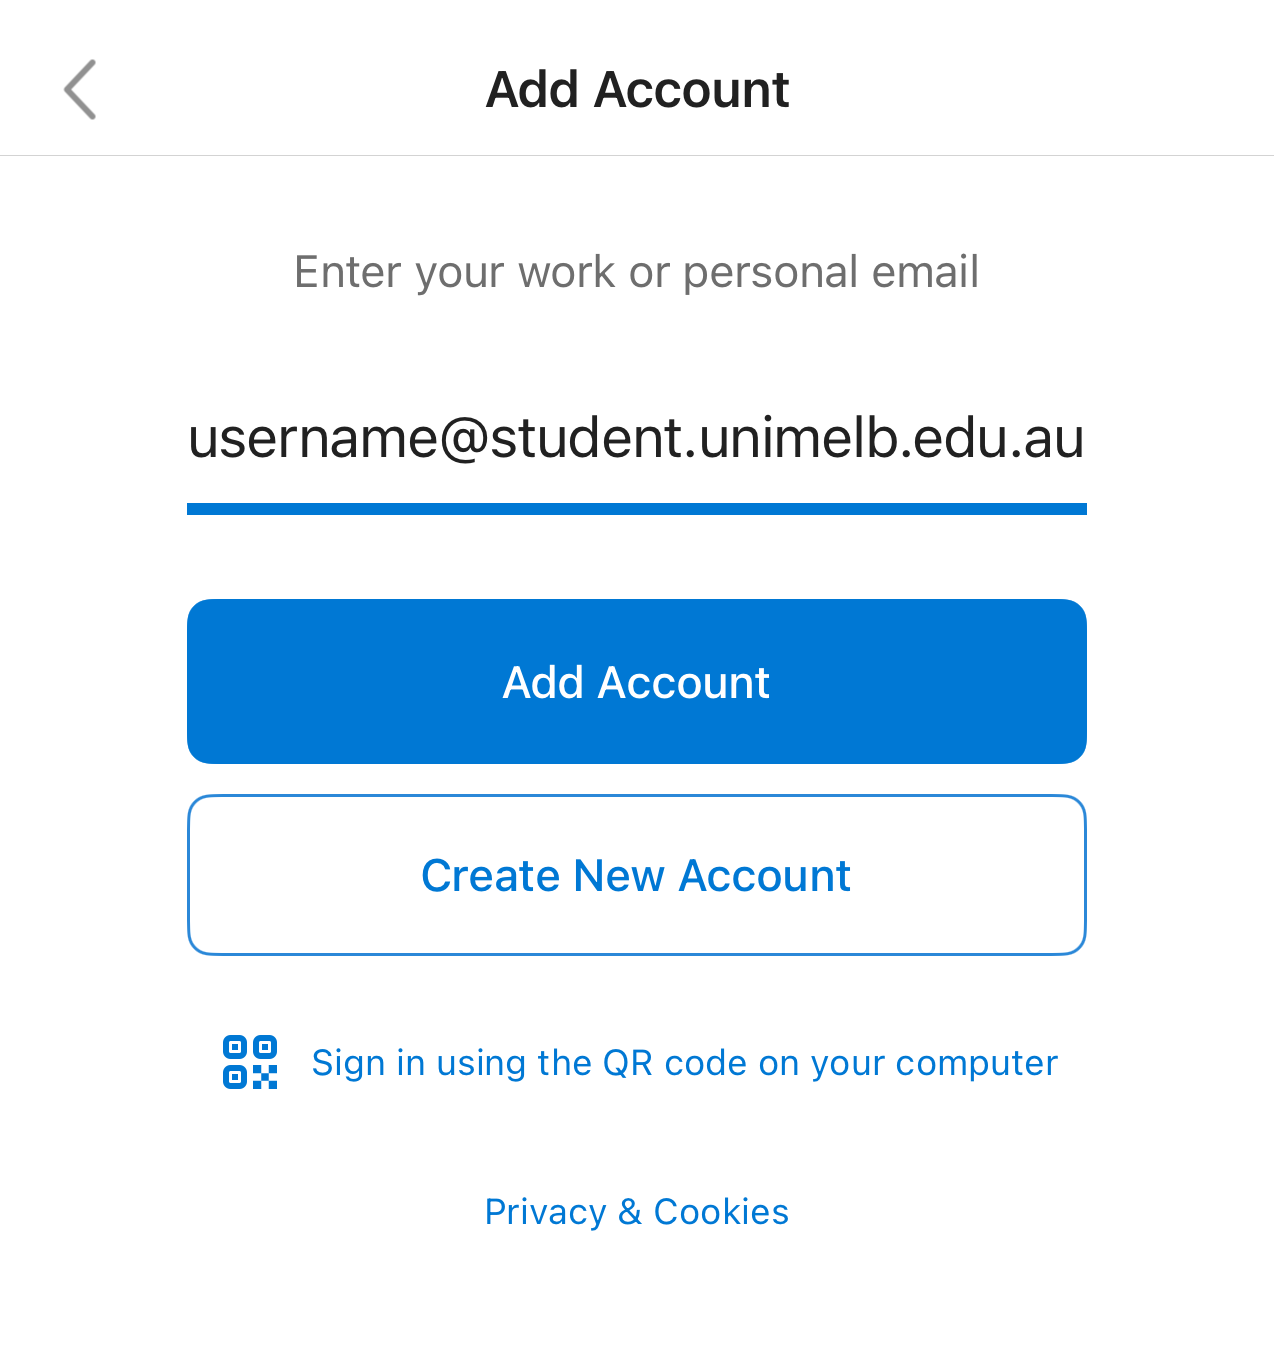
- Enter your primary student email address
[username]@student.unimelb.edu.auand tap Add Account.The QR code sign in option is NOT enabled for Student Outlook accounts.
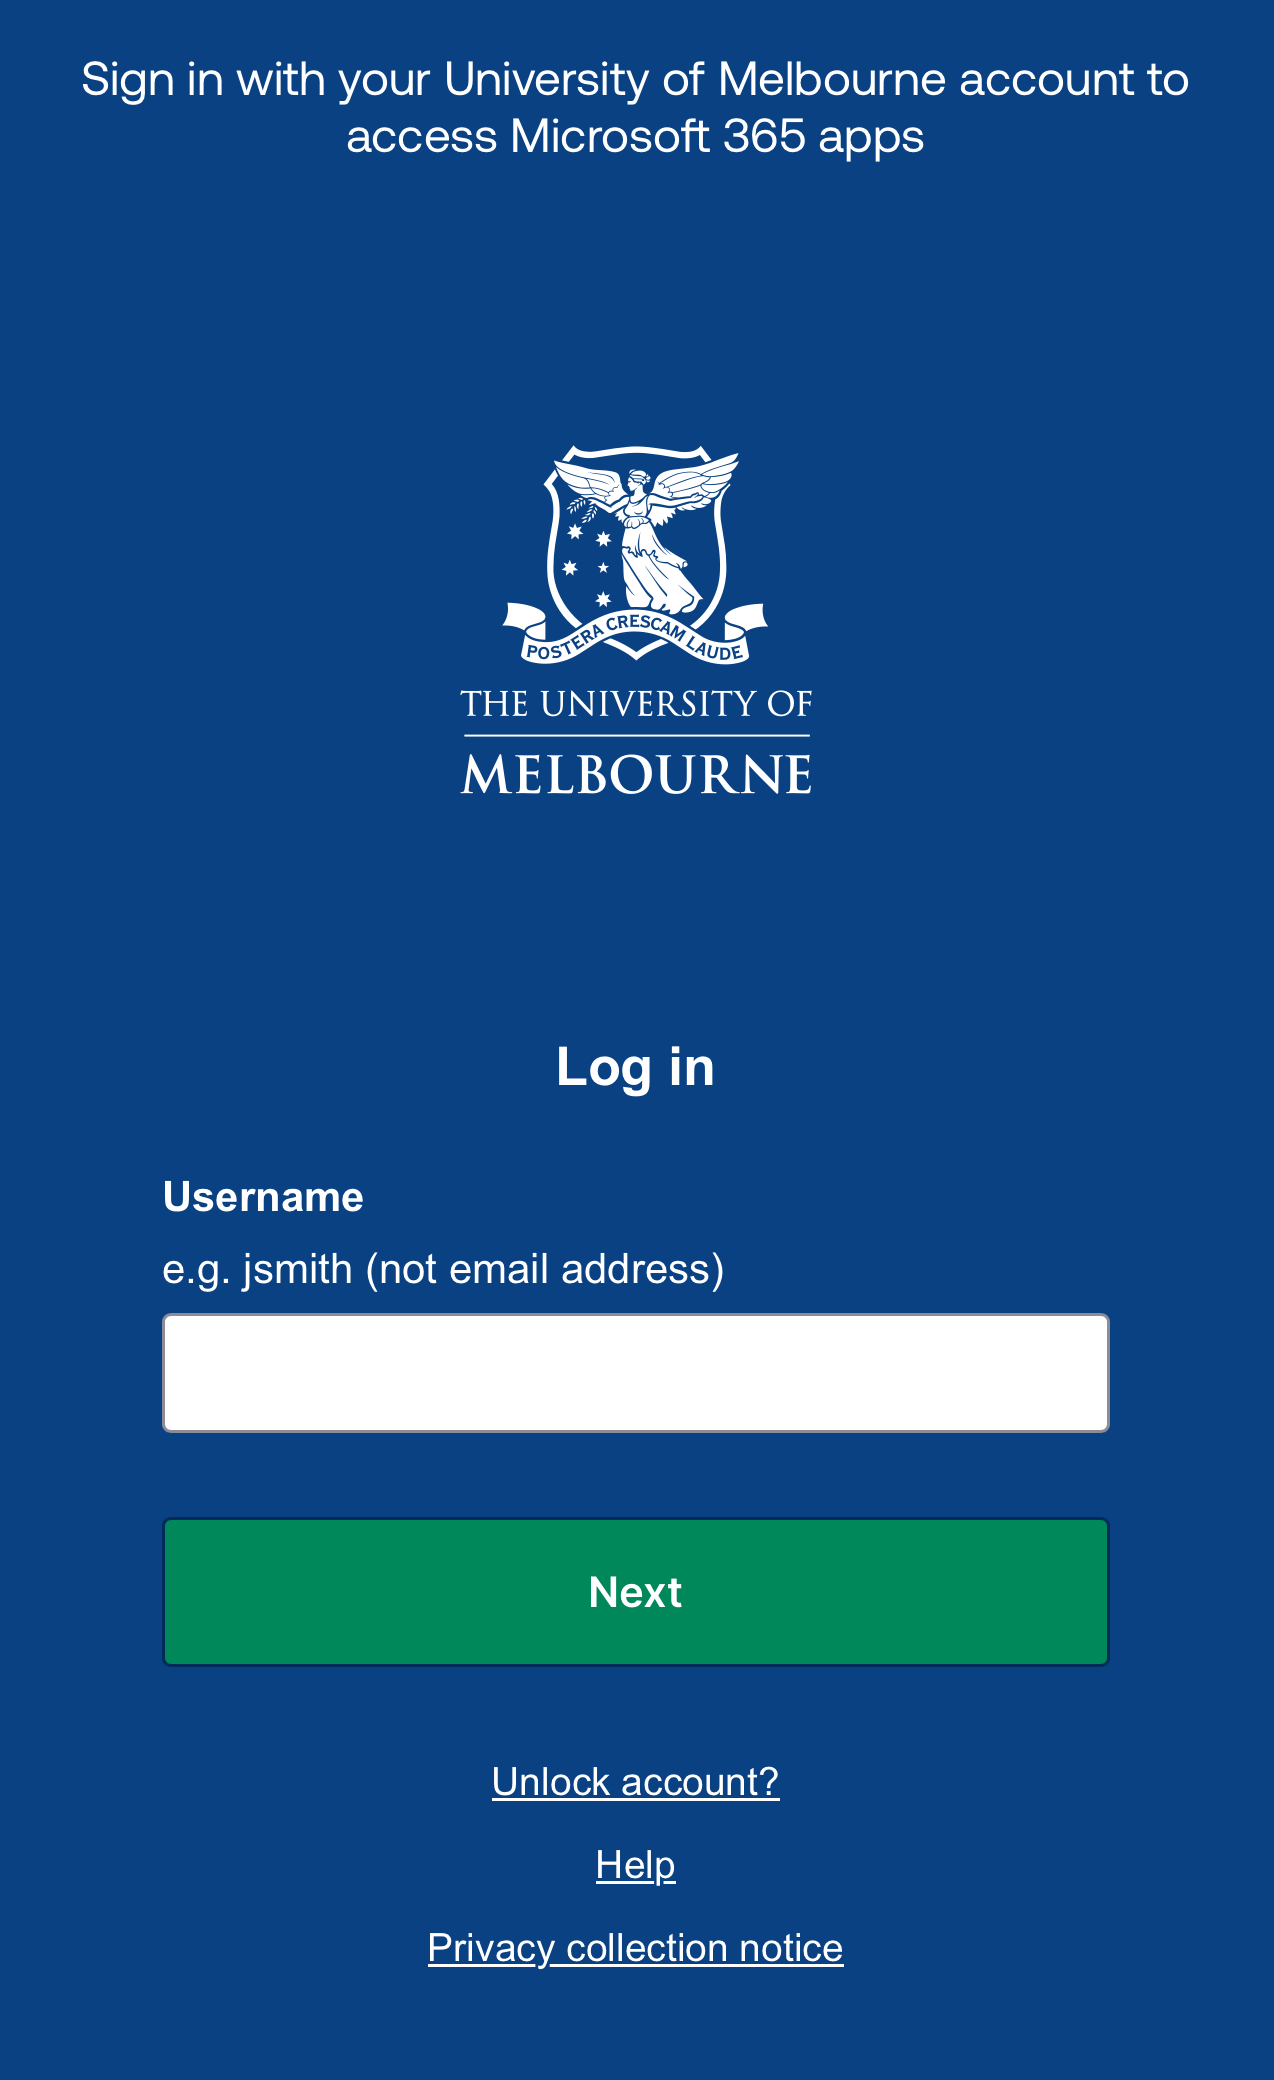
- The SSO login screen will appear. Log in using your student Username and Password and verify your sign in using Okta Verify (or your preferred MFA method).
- Once set up is complete, you may be asked to add another account. Close this by selecting Maybe Later.
- Your student email account will be added to Outlook.
-
If you are setting up Outlook for Android for the first time, you may need to start from Step 3.
- Open the Outlook for Android app on your Android device.
- At the top of the app, tap Inbox, and then select Settings ⚙︎.
- Select Add Account.
- Select Add an email account.
- Enter your primary student email address
[username]@student.unimelb.edu.auand tap Continue.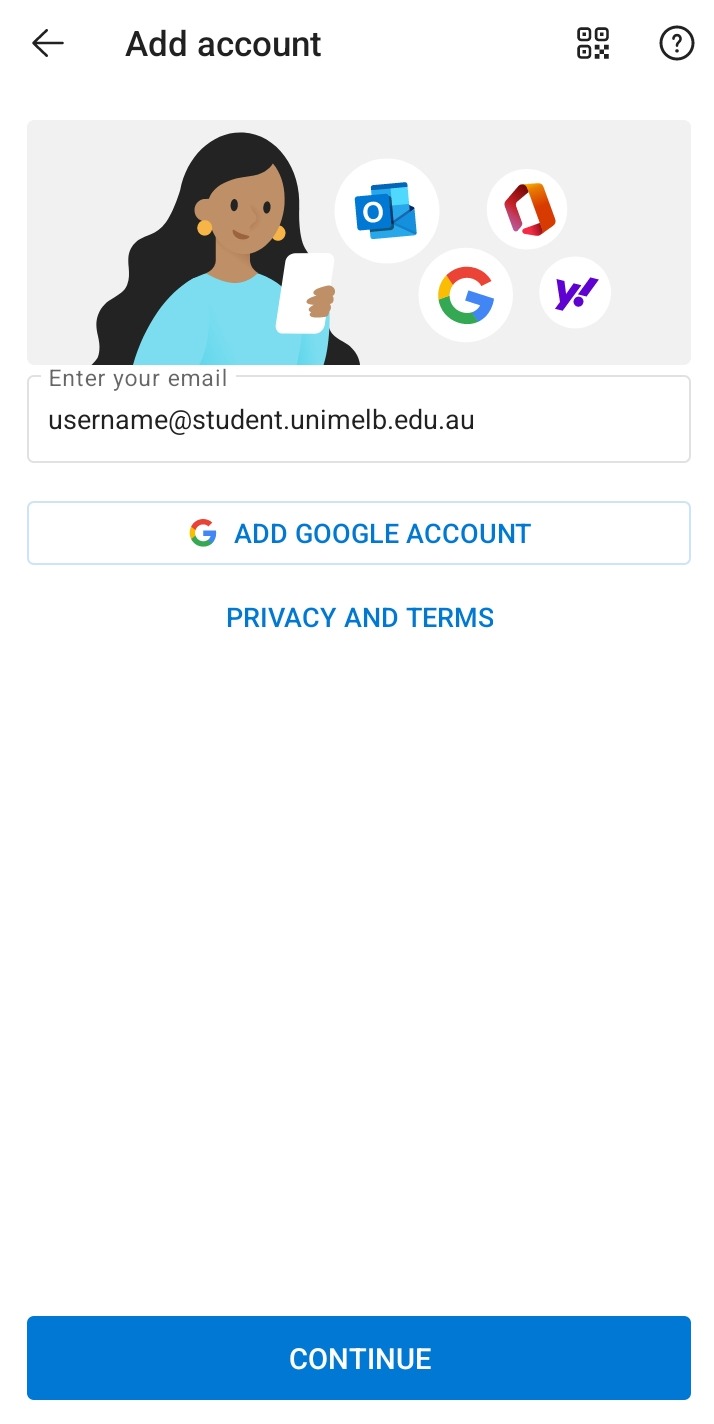
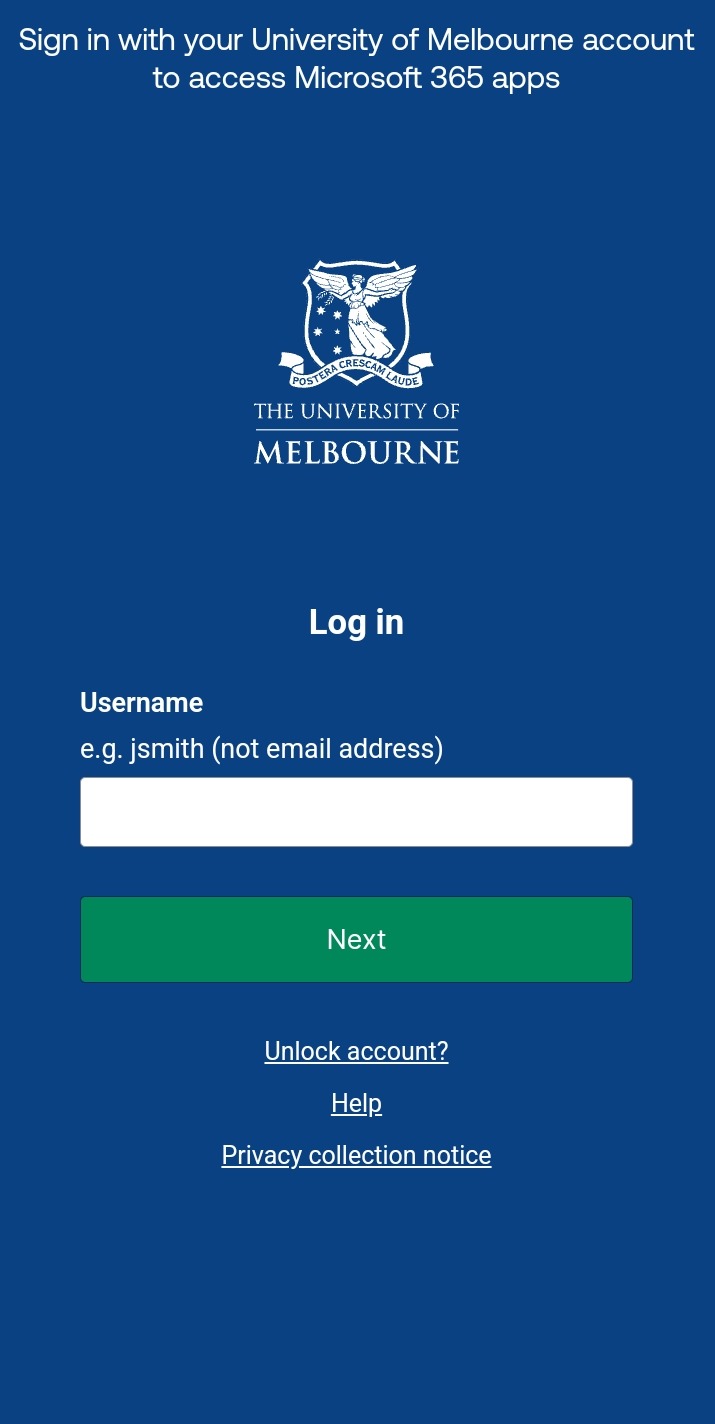
- The SSO login screen will appear. Log in using your student Username and Password and verify your sign in using Okta Verify (or your preferred MFA method).
- Once set up is complete, you may be asked to add another account. Close this by selecting Maybe Later.
- Your student email account will be added to Outlook.
Other email clients
-
- iOS/iPadOS Mail: Set up an Outlook account on the iOS Mail app
- Mac Mail App: Set up Exchange account access using Mac OS X 10.10 or later
It is not possible to set up your student email in the Gmail app for Apple devices.
-
Support & troubleshooting
-
Error message
Troubleshooting steps
“Oops, something went wrong. We were unable to complete your authentication flow.”
- Uninstall Microsoft Authenticator from your device.
- Attempt to set up your student email in your email client again.
“Something went wrong. [5nlhg]”
- Uninstall Microsoft Authenticator from your device.
- Attempt to set up your student email in your email client again.
"Something went wrong. [657rx]" This issue is usually resolved by disconnecting your student account from your Windows device.
You can do this by following the steps below:
- Go to Settings.
- Click on Accounts.
- Click on Access work or school.
- Select your student account, and click Disconnect.
- Restart your device.
- Attempt to set up your student email in your Microsoft Outlook again.
If the error you are seeing is not listed in the table above or you are still unable to set up your student email in your preferred email client after following the steps above, get help by contacting Student IT.
-
Yes, a limited number of third-party email clients have been approved for use.
These include Thunderbird, Thunderbird Android, and SparkMail.
Please be aware that Student IT does not support these applications. If you are having issues using the applications after setting up your student email, please contact the third-party application’s support team directly.
Email usage rules
When you agree to the Enrolment Declaration (as part of your online enrolment/re-enrolment) you acknowledge that University correspondence may be issued electronically and agree to check my.unimelb notices and University emails at least twice per week, including during University breaks or Leave periods.
As part of the Terms and Conditions of enrolment, students agree to check their email at least twice per week, including during university breaks or leave periods. The University will use student email accounts to send important correspondence such as offers of graduation.
University emails may also occasionally land in your spam folder. Even if you are familiar with your filters, security rules on the internet are constantly changing. Due to this, we recommend checking your spam folder regularly to ensure you don’t miss any important notifications.
Students are only permitted to send emails to students enrolled in the same course and/or subjects as themselves, and they must use their official university email address (not their Gmail or Yahoo address, for example).
Whilst subject- and course-wide emailing lists do exist, students are not allowed to use these lists to send spam. The use of email lists to advertise or search for books for sale is spamming and does lead to penalties.
These rules exist to protect students from receiving spam.
Please ensure that any email that you send to the University of Melbourne or its staff is sent from your official University account, as this will allow the University to access your student profile in responding to your enquiry or request.
The University of Melbourne is only able to access and divulge details from student records if it can verify that an enquiry is being made from the student in question. Students should therefore ensure that any emails sent to Stop 1 or University staff are sent from their official student email account.
Student email support & troubleshooting
-
As a student enrolled at the University, you are provided with a student email account because:
- Your student email address identifies you as a University of Melbourne student when you contact University staff.
- Your student email account allows Stop 1 and University staff to contact you about important information regarding your enrolment, fees, courses and classes.
- Due to privacy legislation, University staff cannot communicate information about your personal enrolment details to any email address other than your student email account.
-
- Refresh your inbox. Some emails may take a few minutes to arrive depending on the size of the email and connection speed with the server.
- Check your spam folder. It is common for emails from users or organisations external to the University to end up in this folder.
- Verify your email forwarding settings. If you have activated email forwarding, please check the inbox of the chosen email account.
- Review any email rules you have set up. Ensure that you are not directing certain emails to other folders or to the Deleted Items folder.
If you are not receiving emails from a certain system (e.g. Canvas LMS), please check the email notification settings from within the system to make sure they have been enabled.
If you are still experiencing issues with receiving emails, please contact Student IT.
-
University email accounts are hosted and supported by Microsoft Outlook, which is not accessible in Cuba, Iran, Democratic People’s Republic of Korea, Sudan, and Syria. If you are in a region where Outlook is not accessible, you will be unable to access Outlook's email service directly through my.unimelb or the Microsoft Outlook direct login page.
To access your student email anywhere in the world, we recommend connecting to the University’s VPN Global Protect.
We also suggest activating email forwarding to allow emails that are sent to your student email inbox to be accessible from another email inbox that is enabled in your region.
-
When migrating Gmail labels to Outlook, they are transformed into folders because Outlook uses a folder-based system. Each Gmail label is converted into a corresponding folder in Outlook. If you have nested labels in Gmail (e.g., Work > Projects), they typically convert into nested folders in Outlook, thereby preserving the hierarchy.
Emails with multiple labels in Gmail are copied into multiple folders in Outlook, with the same email in each folder. This means you may see duplicate emails as a result, including the same copy in your ‘Inbox’.
If you want to avoid these automatically created folders in Outlook, you can export them as a ‘.pst’ file as a backup and then, delete the folders. You can use the ‘Category’ feature in Outlook to group your email if you choose to do so.