Download your Microsoft account data
Outlook
Your University of Melbourne student account will be disabled following a 12-month grace period.
Therefore, you will only have this period to be able to download your Outlook data before your data is revoked from University systems.
Access to applications part of student Microsoft 365 licensing, including Outlook, will expire at the end of your 12-month grace period.
What you need to do
Export and import Outlook data (.pst)
Please ensure that you have sufficient storage space on your local device before exporting.
Windows
It is recommended to Export and Import your Outlook files, such as Emails, Contacts, and other folders, by following the steps below from Microsoft:
macOS
Microsoft has launched the Import function for .pst files in the New Outlook on macOS devices. However, students will still need to use myUniApps to export their .pst files for now.
Export
- Log into the browser version of myUniApps
- Go to "Student Desktop"
- Click on the Windows logo on the bottom left. Find and open Outlook

- Log into your student email
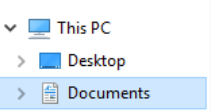
- Export the .pst file by following the steps here. Ensure the file is downloaded to the "Documents" folder within the 'This PC' directory
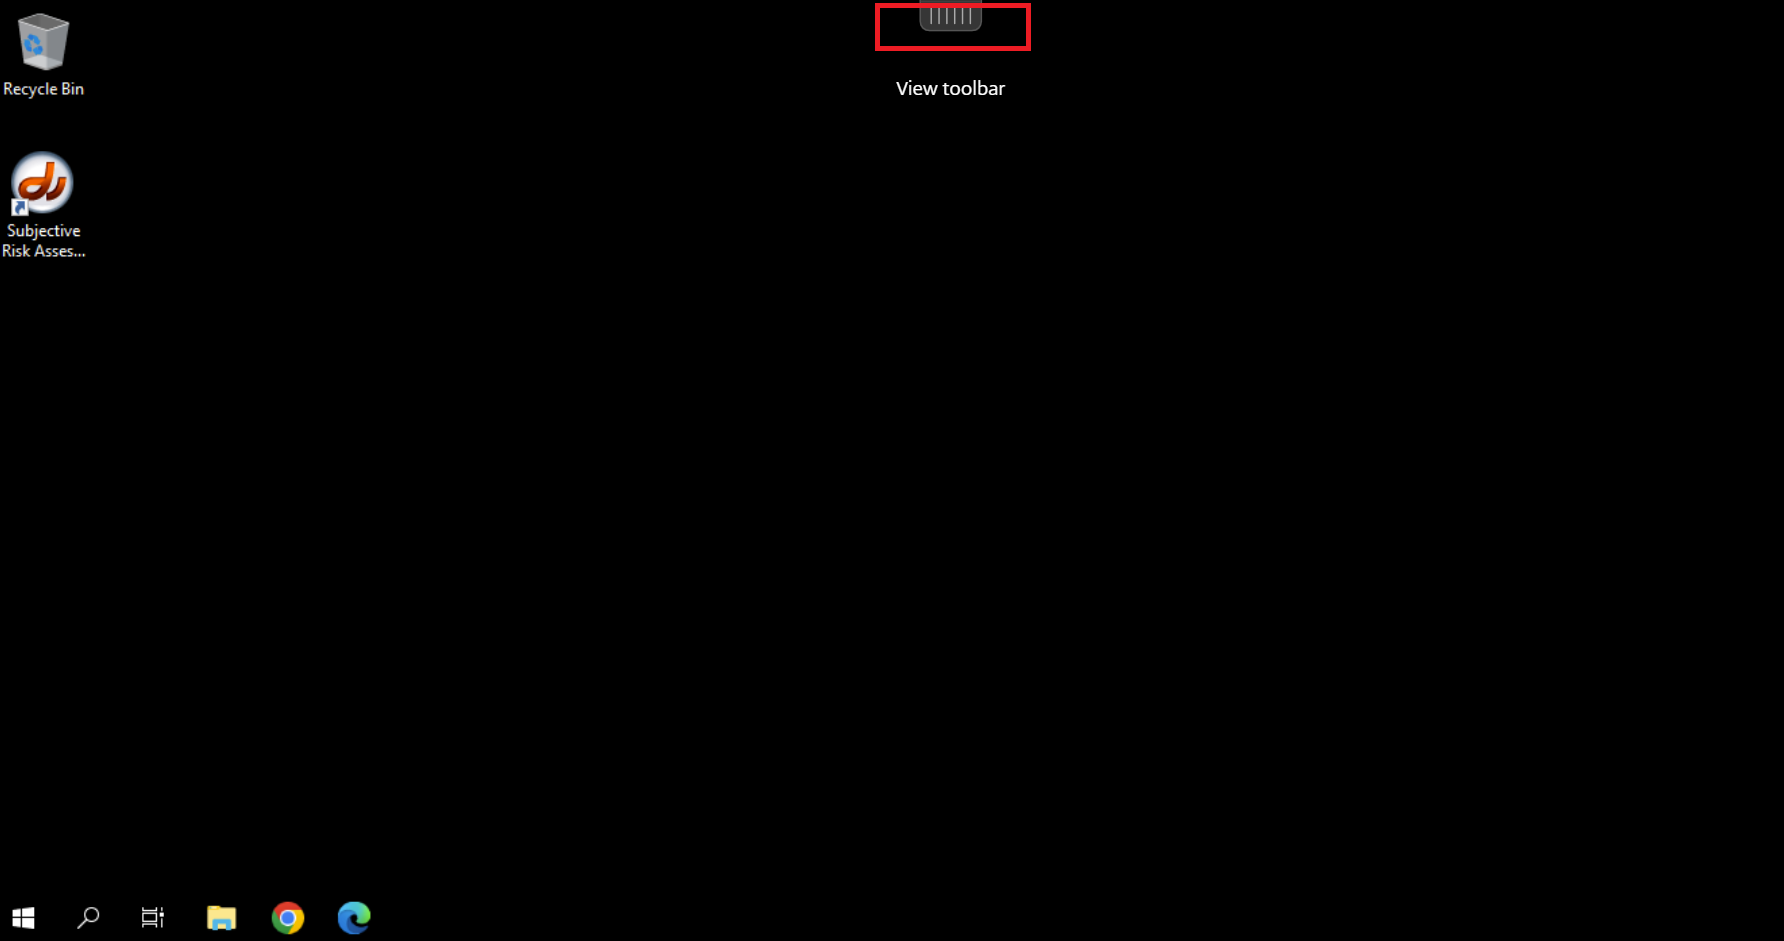
- Once the file has downloaded, please click on the "View toolbar" button on top of the desktop screen (marked in the screenshot)
- Click on "File transfer" and "Download"
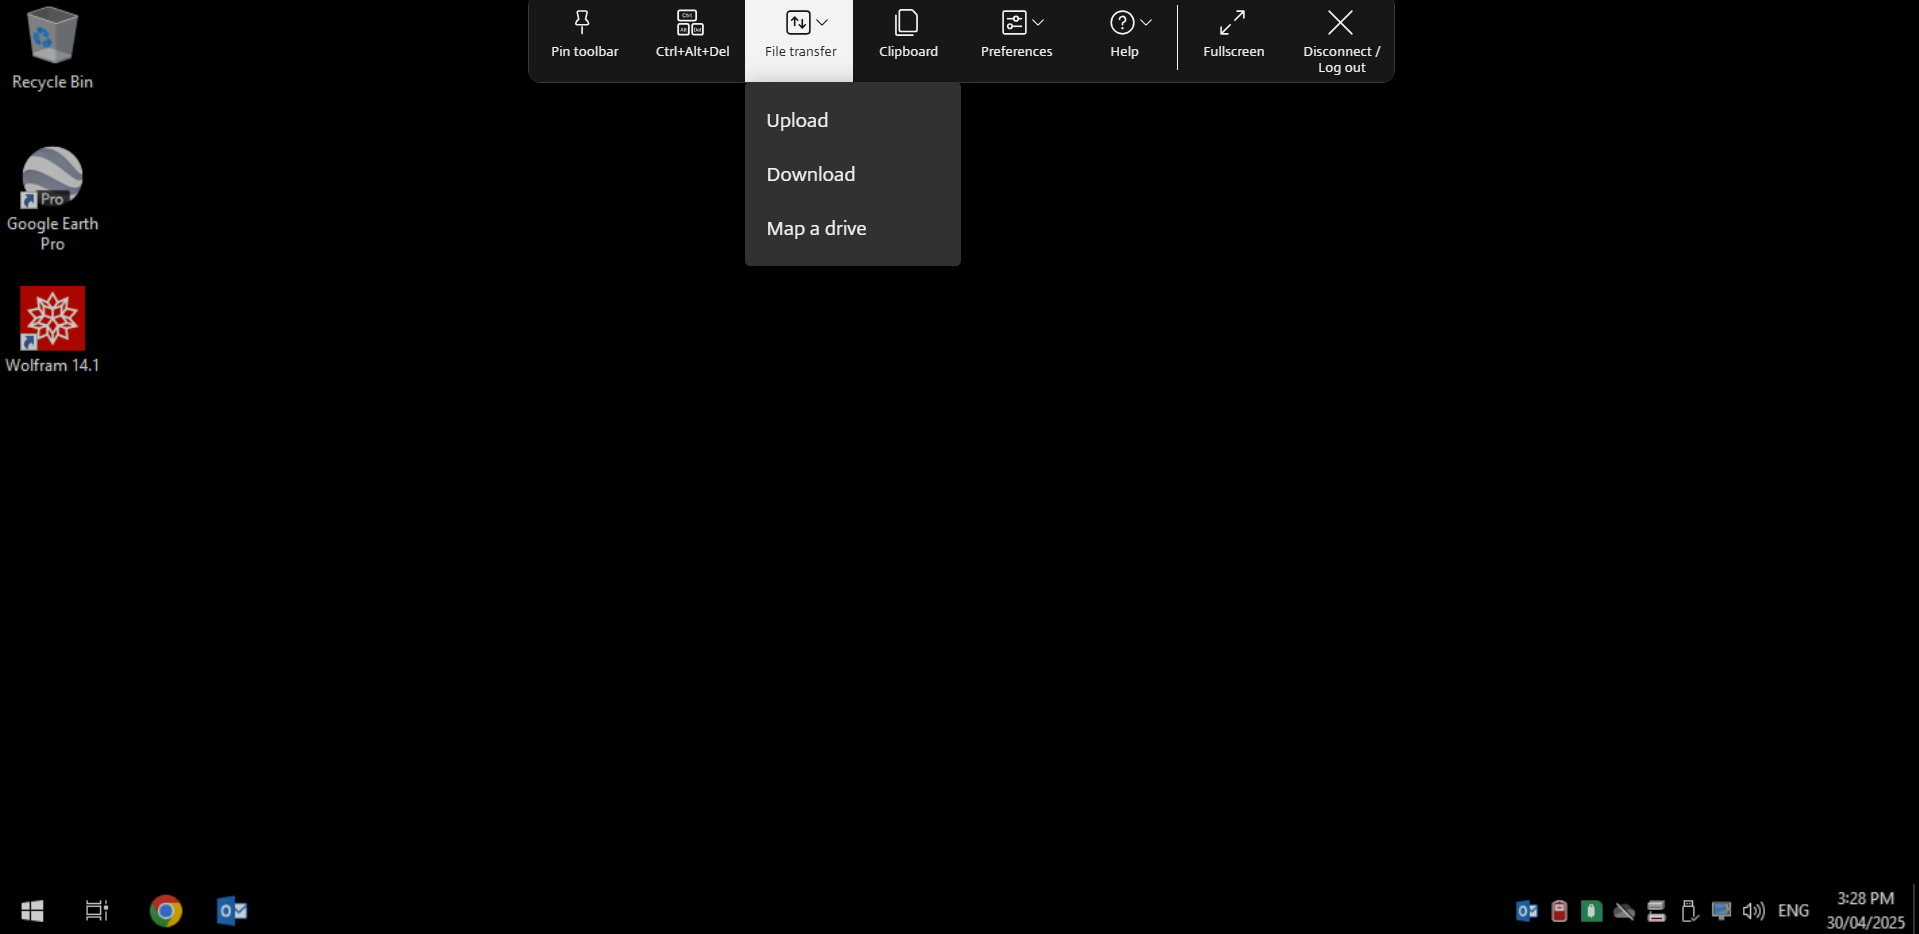
- Go to "Documents" and double-click on the .pst file. It should start downloading immediately.
- Once downloaded on your local device, you can close myUniApps on your browser
Import
- Open the New Outlook app using your MacOS device
- On the Outlook for Mac File menu on the top left, click Import
- Select Outlook for Windows archive file (.pst), then click Continue
- Locate the .pst file, then click Import
- When the file been successfully imported, click Finish
Prev: Initial Offboarding Next: Export OneDrive and SharePoint
OneDrive and SharePoint
Your University of Melbourne student account will be disabled following a 12-month grace period.
Therefore, you will only have this period to be able to download your OneDrive and SharePoint data before your data is revoked from University systems.
Access to applications part of student Microsoft 365 licensing, including OneDrive and SharePoint, will expire at the end of your 12-month grace period.
What you need to do
Export and download your OneDrive and any files you collaborated on in SharePoint that you wish to keep.
-
How to download OneDrive data to your personal device?
Please ensure that you have sufficient storage space on your local device before exporting.
I. Using Finder (macOS) / File Explorer (Windows)
Please follow the steps provided here.
II. Using OneDrive Online (macOS/Windows)
- On the Microsoft 365 website, sign in with your University of Melbourne email address rather than a personal Microsoft account.
- Go to Apps > OneDrive
- Select the files or folders you want to download:
- Several files at once: Selecting one file, scrolling down the list, then hold down the Shift key while left-clicking the last item you want to select; OR

- All files at once: Ticking the check box on the top left (next to "Name") as shown below:

Note. If you select multiple files or folders, the data will be downloaded as a zip file
- In the top navigation, select Download. (You can also right-click the file, photo, or folder, and select Download.)
 This step may take some time depending on the speed of your internet connection and the amount of data you are downloading. If your browser prompts you, choose Save or Save As and browse to the location where you want to save the download.
Note. Some browsers will download directly to your device’s Downloads folder without prompting.The process is identical for downloading files individually or in bulk from a SharePoint document library.
-
How do I upload data to my personal OneDrive?
Once you have downloaded data from your University of Melbourne OneDrive, you may want to upload it to your personal OneDrive.
Note. Depending on the amount of data you need to upload you may need to purchase additional OneDrive storage for your personal account. A comparison of plans and their storage limits can be found here- On the OneDrive website, sign in with your personal Microsoft account, and then browse to the location where you want to add the files.
- Select Upload.

- Select the files you want to upload, and then select Open.
- For transferring large files or lots of files, we recommend adding the files to the OneDrive desktop app rather than using the Upload button on the website.
- You can also drag files from File Explorer or Mac Finder straight to your files on the OneDrive website.
- In the Google Chrome or Microsoft Edge browser, you can also upload folders from the Folder option on the Upload menu or drag folders to the website.
Tips:
OneNote
Your University of Melbourne student account will be disabled following a 12-month grace period.
Therefore, you will only have this period to be able to download your OneNote data before your data is revoked from University systems.
Access to applications part of student Microsoft 365 licensing, including OneNote, will expire at the end of your 12-month grace period.
What you need to do
Export your OneNote notebooks that you wish to keep.
Windows
Students with access to Windows devices can follow one of the three methods below to export notebooks from their University OneNote account. Please choose the method best suited to your device, storage, and circumstances.
-
If you would like your notebooks exported as PDFs, please be aware that large notebooks may take longer to export, and you will no longer be able to edit them once the export is complete.
- Launch the OneNote Desktop App.
- Select the notebook you want to export.
- Click on File > Export.
- Under "1. Export Current:", select Notebook.
- Under "2. Select Format:", select PDF.
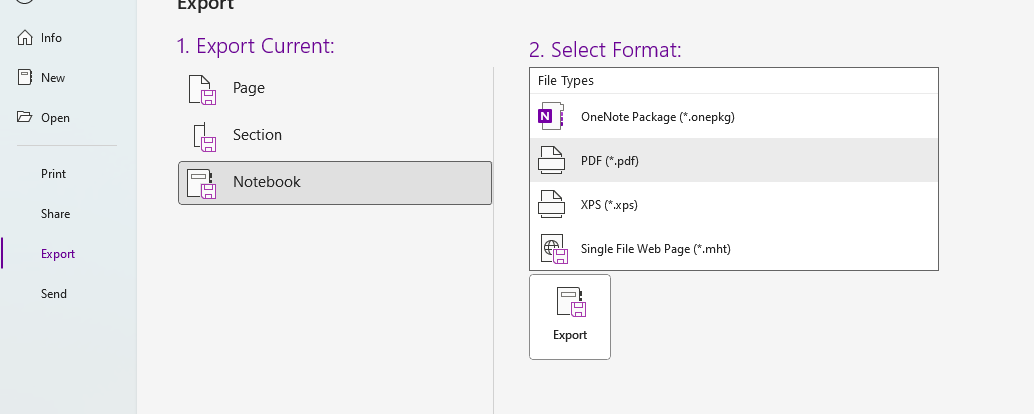
- Click Export.
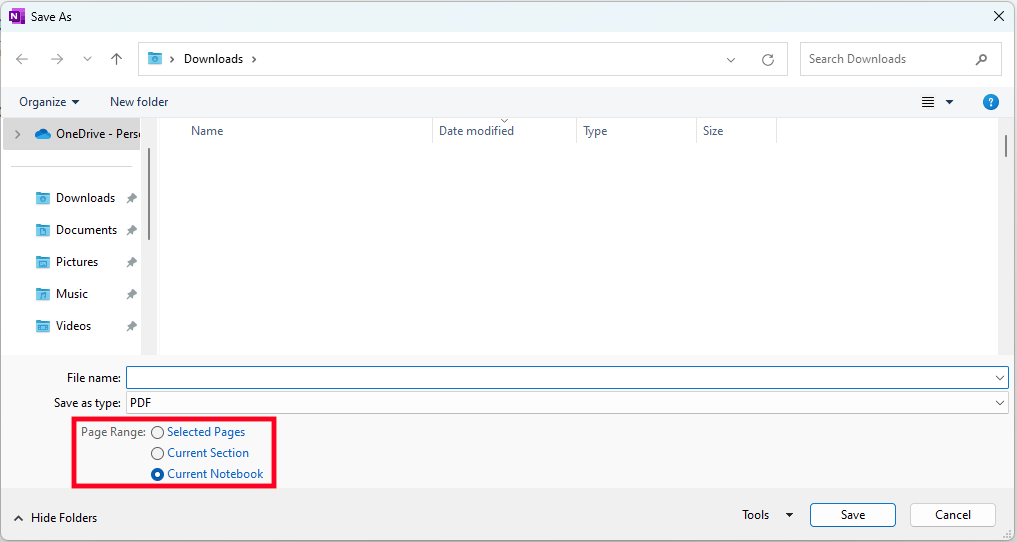
- Select a location to save the export and ensure the "Page Range" is set to Current Notebook.
If you have any concerns about local storage space on your device, please save the PDF files to your preferred personal cloud storage location (e.g., Google Drive, OneDrive, or Dropbox).
-
The .onepkg format exports an entire OneNote notebook, including all its sections, as a single compressed file. These files can be opened in OneNote using another account, allowing you to continue editing them.
Export
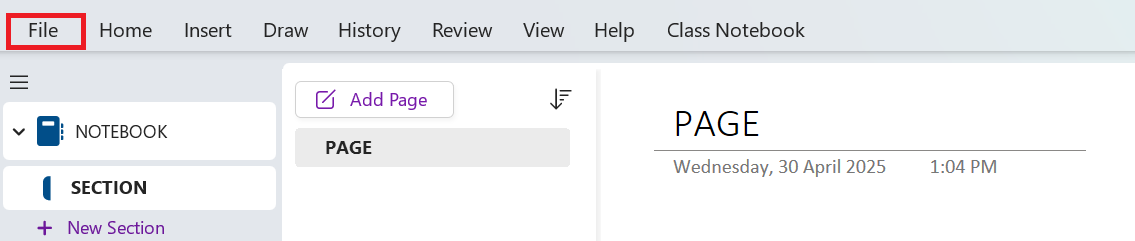
- Launch OneNote app > Ensure you are logged into your University OneNote account > Click on File
- Click on Export on the left side bar > Select Notebook > Select OneNote Package (*.onepkg) > Click on the Export button

Import
- Launch OneNote app > Ensure you are logged into your personal OneNote account > Click on File
- Click on Open > Browse > Find the folder you exported the notebook to > Select "OneNote Files" as the File Type.

Note: If your OneNote app closes after importing, please re-open it to confirm if the import was successful.To confirm if the notebooks are all synced to your personal OneNote cloud/Online after the import, please check their Sync Status here. - Launch OneNote app > Ensure you are logged into your University OneNote account > Click on File
-
If you encounter any issues exporting your notebooks as .onepkg files, you can manually copy sections from your University OneNote notebooks to your personal OneNote account. This method allows you to continue editing the notebooks after the transfer.
- Launch OneNote app
- If you have not, please add your personal Microsoft account to the OneNote app by following the steps here
- Ensure you have chosen your personal OneNote account (you can see the selected profile on the top right of the OneNote app)
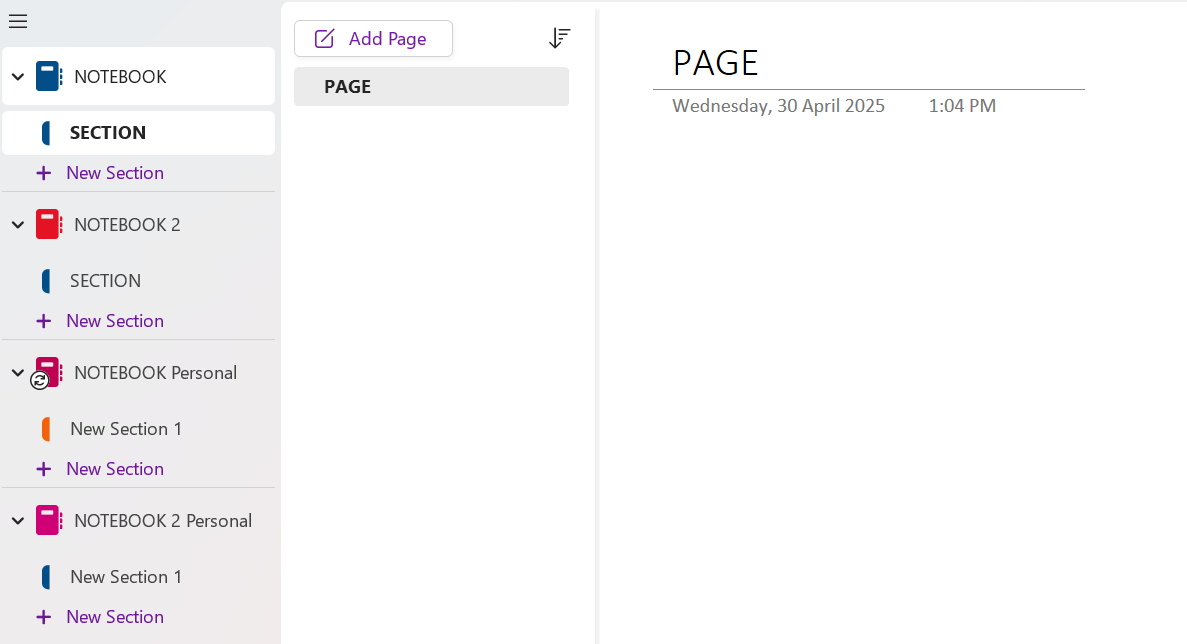
- Create empty notebooks using your personal OneNote account by following the steps here.
Note. You will need to create the same number of notebooks as you plan to export from your University Microsoft account - Clearly name these notebooks so you can easily differentiate which ones are saved in your personal and University Microsoft accounts. For example, [Notebook name] Personal
- Click the Profile tab on the top right and select your University OneNote account
- Right click on one of the Sections from the one of the notebooks in your University account > Click Move or Copy

- Choose the newly created notebook (Step 4) that you would like to transfer the Section to > Click "Copy".

Note. This is to make sure you still have access to the original file if an error occurs during the transfer - Please do this for each section of any existing notebooks in your University OneNote account:
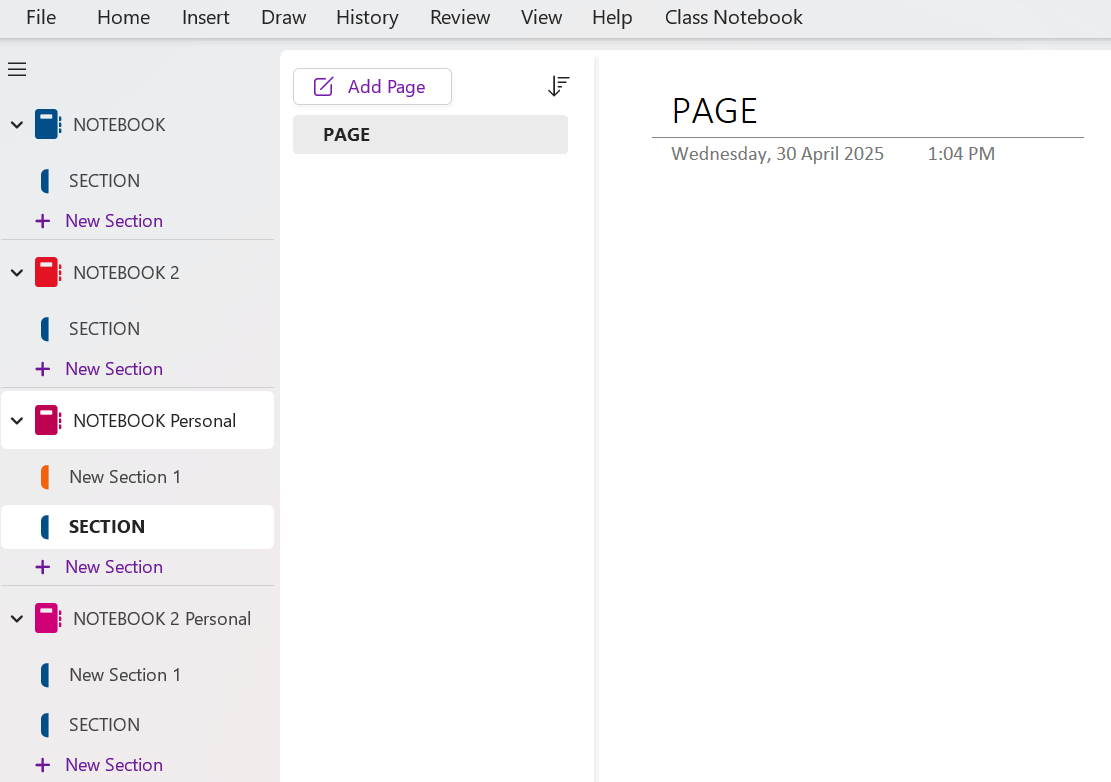
To confirm if the notebooks are all synced to your personal OneNote cloud/Online after the transfer, please check their Sync Status here.
macOS
- Launch the OneNote Desktop App.
- Click the profile in the bottom left corner.
- Click the + next to Connected Services.
- Under "Add Storage Account", click on OneDrive (Add your personal account).
- Sign in to your personal Microsoft account.
- Create a new notebook.
- Go to your university notebook.
- Copy sections from your university notebook to the new notebook in your personal account.
Note. Please use the Copy function to ensure you still have access to the original file if an error occurs during the transfer
Prev: Export OneDrive and SharePoint Next: Download your other account data